

今回はファイル読み込み/書き込みについてやっていきたいと思います。
ファイルにはフォーマットがある!?
読み込む/書き込むファイルのシュルには大きく分けて3種類あります。
■テキストファイル
■Iniファイル
■Xmlファイル
テキストファイルの場合。。。
とりあえず自由!!独自ルールって感じ!!タブ区切りにしたり、カンマ区切りにしたり。。。
Iniファイルの場合。。。
セクション/キー/バリューで分類される。書き方はこんな感じ
[(Section1)]
(Key1)=(Value1)
(Key2)=(Value2)
[(Section2)]
(Key3)=(Value3)
セクションで括りを決めて、キーとバリューで紐づける。
※()の中は自由に決める。
XMLファイルの場合。。。
タグで括られているファイルで、Iniファイルよりもより深い階層で設定できます。
<?xml version="1.0" encoding="Shift_JIS"?>
<?xml-stylesheet type="text/xsl" href="testxsl.xsl"?>
<(Parent1)>
 <(Children1)>
  <(Grandchild1)>
   <(Great-grandson1)>(Value1)</(Great-grandson1)>
   <(Great-grandson2)>(Value2)</(Great-grandson2)>
  <(Grandchild2)>
   <(Great-grandson3)>(Value3)</(Great-grandson3)>
   <(Great-grandson4)>(Value4)</(Great-grandson4)>
 </(Children1)>
</(Parent1)>
最初の2行はxmlファイルだよ~って宣言している所で、魔法の言葉ですwww
今時はxmlで書く人が多いらしいです。
※()の中は自由に決める。
今回は、Iniファイルの読み書きについてやっていきます!!
Iniファイルの準備をする
まずはテキストを開いて、下記のようなファイルを作りましょう。
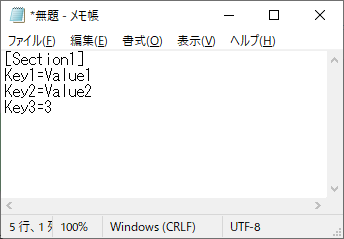
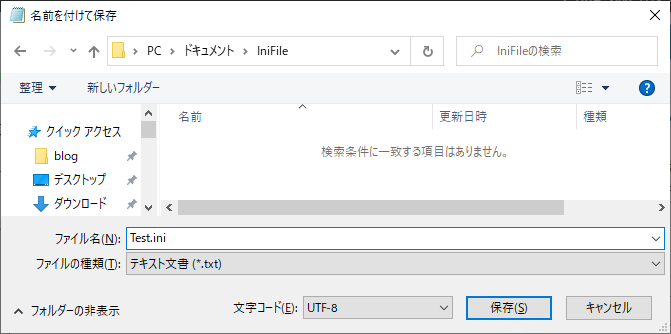
拡張子は何でもいいのですが、分かりやすく[.ini]にしましょう。
ソリューションを作る
ソリューションを作っていきましょう!!
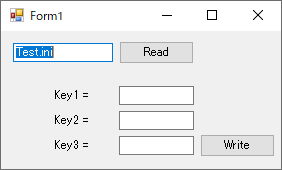
まずは、適当にGUIをつくりました。
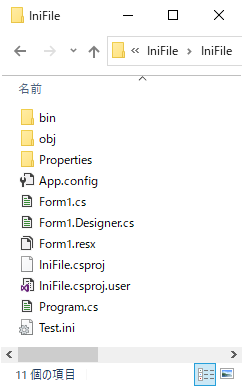
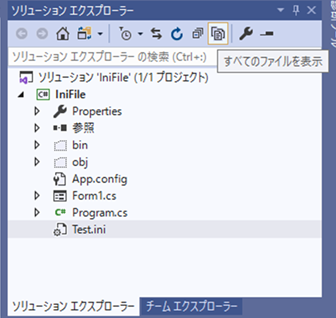
次に先ほど作ったIniFileをプロジェクトに含めます。
■初めにソリューションのフォルダの中にファイルを入れる
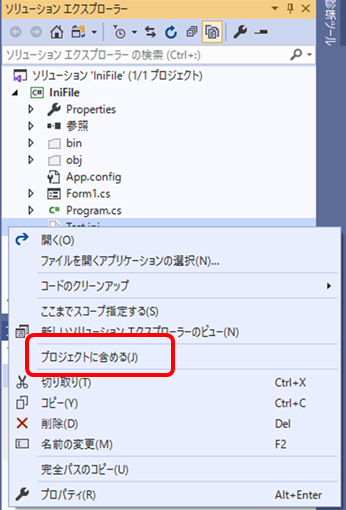
■プロジェクトに含める
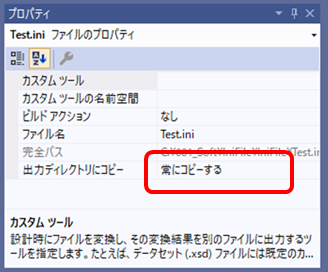
[すべてのファイルを表示]→[対象を右クリック]→[プロジェクトに含める]→[常にコピーする]を選択
これで準備は整いました。
読み込み
読み込みで使うのは、APIを使います。(DLLに定義されている関数)
using System.Runtime.InteropServices;
using System.Reflection;
namespace IniFile
{
    public partial class Form1 : Form
    {
        [DllImport("kernel32.dll")]
        private static extern int GetPrivateProfileString(string lpAppName, string lpKeyName, string lpDefault,
                             StringBuilder lpReturnedString, uint nSize, string lpFileName);

        [DllImport("kernel32.dll")]
        private static extern int GetPrivateProfileInt(string lpAppName, string lpKeyName, int nDefault,
                        string lpFileName);

        private void btnRead_Click(object sender, EventArgs e)
        {
            string fp = System.IO.Directory.GetParent(Assembly.GetExecutingAssembly().Location).ToString();
            fp += "\\" + txtFileName.Text;

            StringBuilder sb = new StringBuilder(1024);
            int res = GetPrivateProfileString("Section1", "Key1", "Default", sb, (uint)sb.Capacity, fp);
            txtValue1.Text = sb.ToString();

            res = GetPrivateProfileString("Section1", "Key2", "Default", sb, (uint)sb.Capacity, fp);
            txtValue2.Text = sb.ToString();

            int value = GetPrivateProfileInt("Section1", "Key3", -99, fp);
            txtValue3.Text = value.ToString();
        }
    }
}
DLLをインポートする。このDLLのこの関数を使うよって定義する。
ボタンを押されたら、exeと同じ階層にあるiniファイルのパスを取得。
インポートした関数で読み込み。
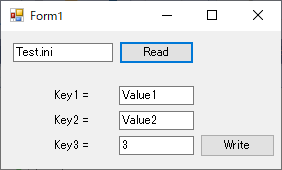
結果はこんな感じ。
書き込み
最後に書き込みです。
    [DllImport("kernel32.dll", SetLastError = true)]
    private static extern int WritePrivateProfileString(
      string lpAppName, string lpKeyName, string lpString, string lpFileName);

    private void btnWrite_Click(object sender, EventArgs e)
    {
        string fp = System.IO.Directory.GetParent(Assembly.GetExecutingAssembly().Location).ToString();
        fp += "\\" + txtFileName.Text;

        int res;
        res = WritePrivateProfileString("Section1", "Key1", txtValue1.Text, fp);
        res = WritePrivateProfileString("Section1", "Key2", txtValue2.Text, fp);
        res = WritePrivateProfileString("Section1", "Key3", txtValue3.Text, fp);
    }
書き込み用の関数をインポートして、それを使うだけです。
間違って”Section1″→”Section2″にすると下記のようになります。
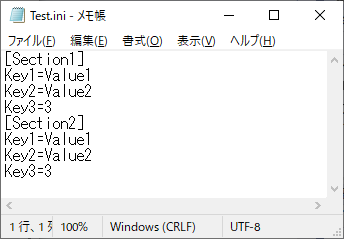
勝手に追記してくれますwwwうれしいのかうれしくないのか。。。
書き込む時に間違いに気づかない時が多く、読み込みした時に「あれ?」ってなるときが多いです。
その時は、書き込みに注目するといいかもしれません。
まとめ
Iniファイルの読み書きについて、書きました。
Kernel32.dllをImportすることで簡単に読み書きする事ができます。

業務でプログラミング(C#/VB/Python)を作っている。
挫折を何回も繰り返し、幾度の壁を乗り越えてきた。
乗り越えてきた事を忘れないように記録に残す。
同じ思いをしている人への情報提供になれたらと思う。
基本は初心者に向けたプログラムの情報を提供する。


コメント